GCP Co-Sell Setup
Last updated: June 4, 2026
Step-by-Step Guide for GCP Co-Sell Setup in Clazar
To successfully complete the GCP Co-Sell setup in Clazar, follow the steps below:
✅ Step 1: Setup Google Advantage Partner Program
Log in to Clazar and go to Integrations → GCP Co-Sell.
If you’ve already joined the Partner Advantage program, check off the first step.
Next, click the Sign Marketplace Vendor Agreement link and follow the instructions to become Co-Sell eligible.
Once both steps are completed, mark the checkboxes and hit Save.

✅ Step 2: Notify Google to enable Deal Reg API Access.
To enable Deal Registration API access for your organization, please follow these steps:
Visit the Google Cloud Support Portal.
Click on the Google Cloud Support Portal hyperlink.

Choose Create Support Case.

In the support case form, use the following selections:
Issue Type: Google Cloud Marketplace
Describe Your Issue: Enable Deal Registration API Access
Category: Deal Registration API Error

In the More Details section of the case form, copy and paste the following message (replacing placeholders with your specific details):
Hi Team,
Can you please enable Deal Registration API access for the following account? -
Allowlist Vector ID for V2 API: [18-character Account ID from Partner Advantage Portal. This is present under Account Section]
Customer Name: [Your Organization Name]
Partner Type (ISV/SI): ISV
Partner Hub ID: [Found under the Account section in Partner Hub]
Integrator Name: Clazar
Once the case is submitted, Google will process your request and notify you once access is enabled.
Proceed to the next step when Google enables API access.
🔗 Step 3: Add Service Account
Log in to Clazar and go to Integrations → GCP Co-Sell, copy the Service Account Email mentioned in step two of the setup

Now, login to Partner Hub and navigate to the Users tab in the side navigation bar.
Click the Assign roles button.
Check the “Integrator” checkbox, enter the copied Service Account email under the input box labelled “User email address” and click Save.

Navigate to the Account tab from the left navigation bar and copy the Partner Id.

Paste the copied Partner Id in the text box on Clazar GCP Co-Sell setup page.
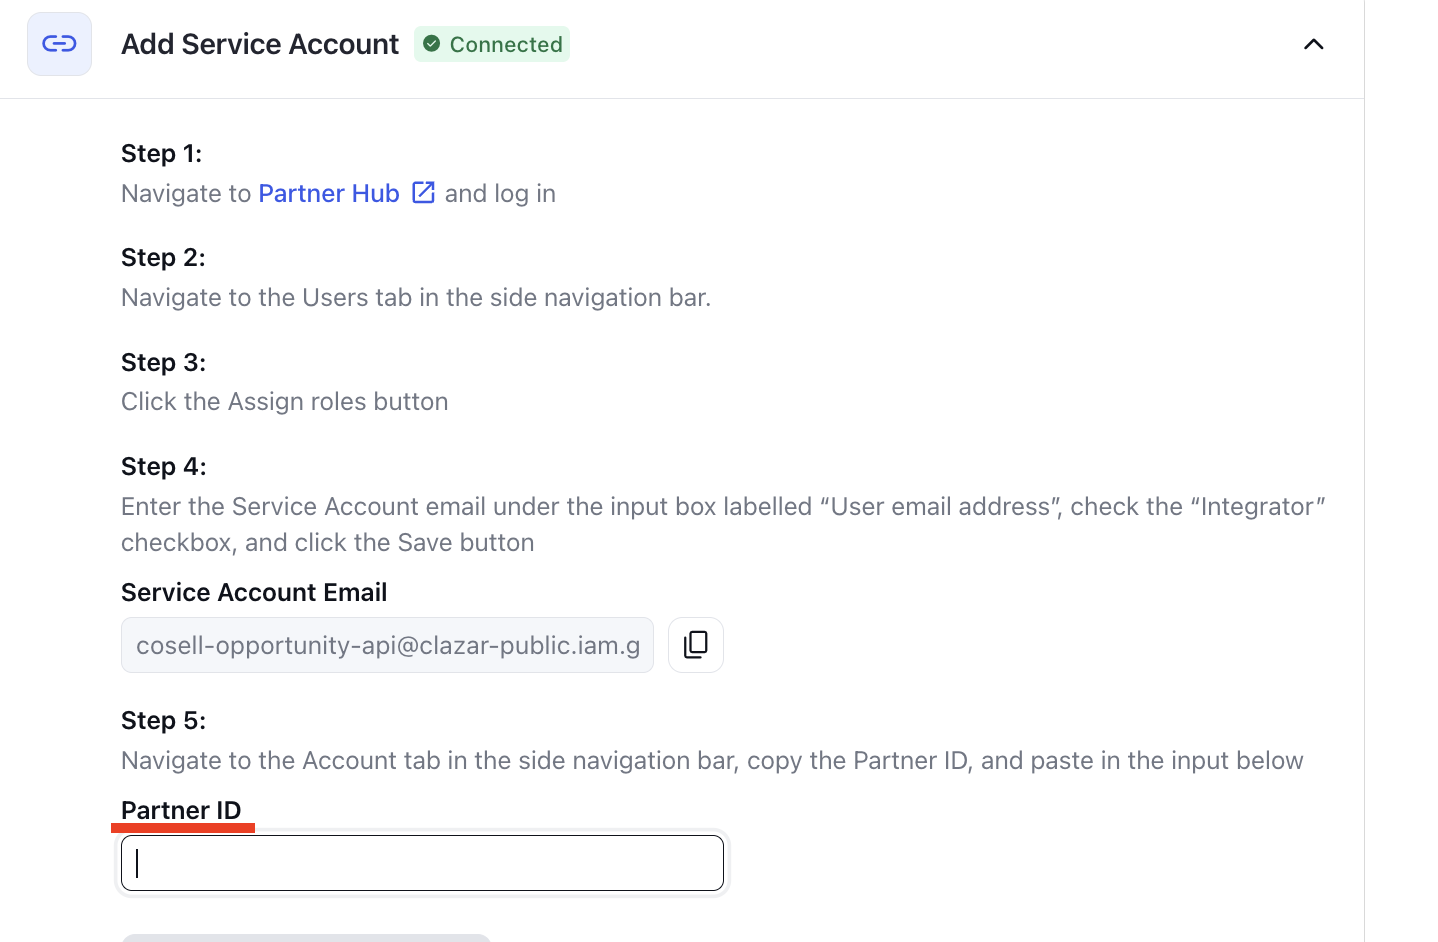
Click Save and Test Configuration.
📝 Note: If you run into any issues or need help, kindly reach out to the Clazar support team.