AWS Marketplace Private Offer Acceptance Guide — Buyer Flow
Last updated: November 17, 2026
Overview
A buyer accepts a SaaS private offer in five steps: open the offer in the correct AWS account, review it, click Subscribe, click Set up your account, and complete registration on the seller's page. The whole flow takes about 5–10 minutes once the right person with the right permissions is signed in.
Step 1 — Open the private offer
Sign in to the correct AWS account first, then open the offer by any of three routes.
Sign in to the AWS Marketplace console with the account that received the offer.
Open the offer using one of these:
Seller's link or AWS email. AWS emails the buyer when an offer is published; click the link in that email or the one your seller sent. Opening it while signed in to the wrong account returns Page not found (404).
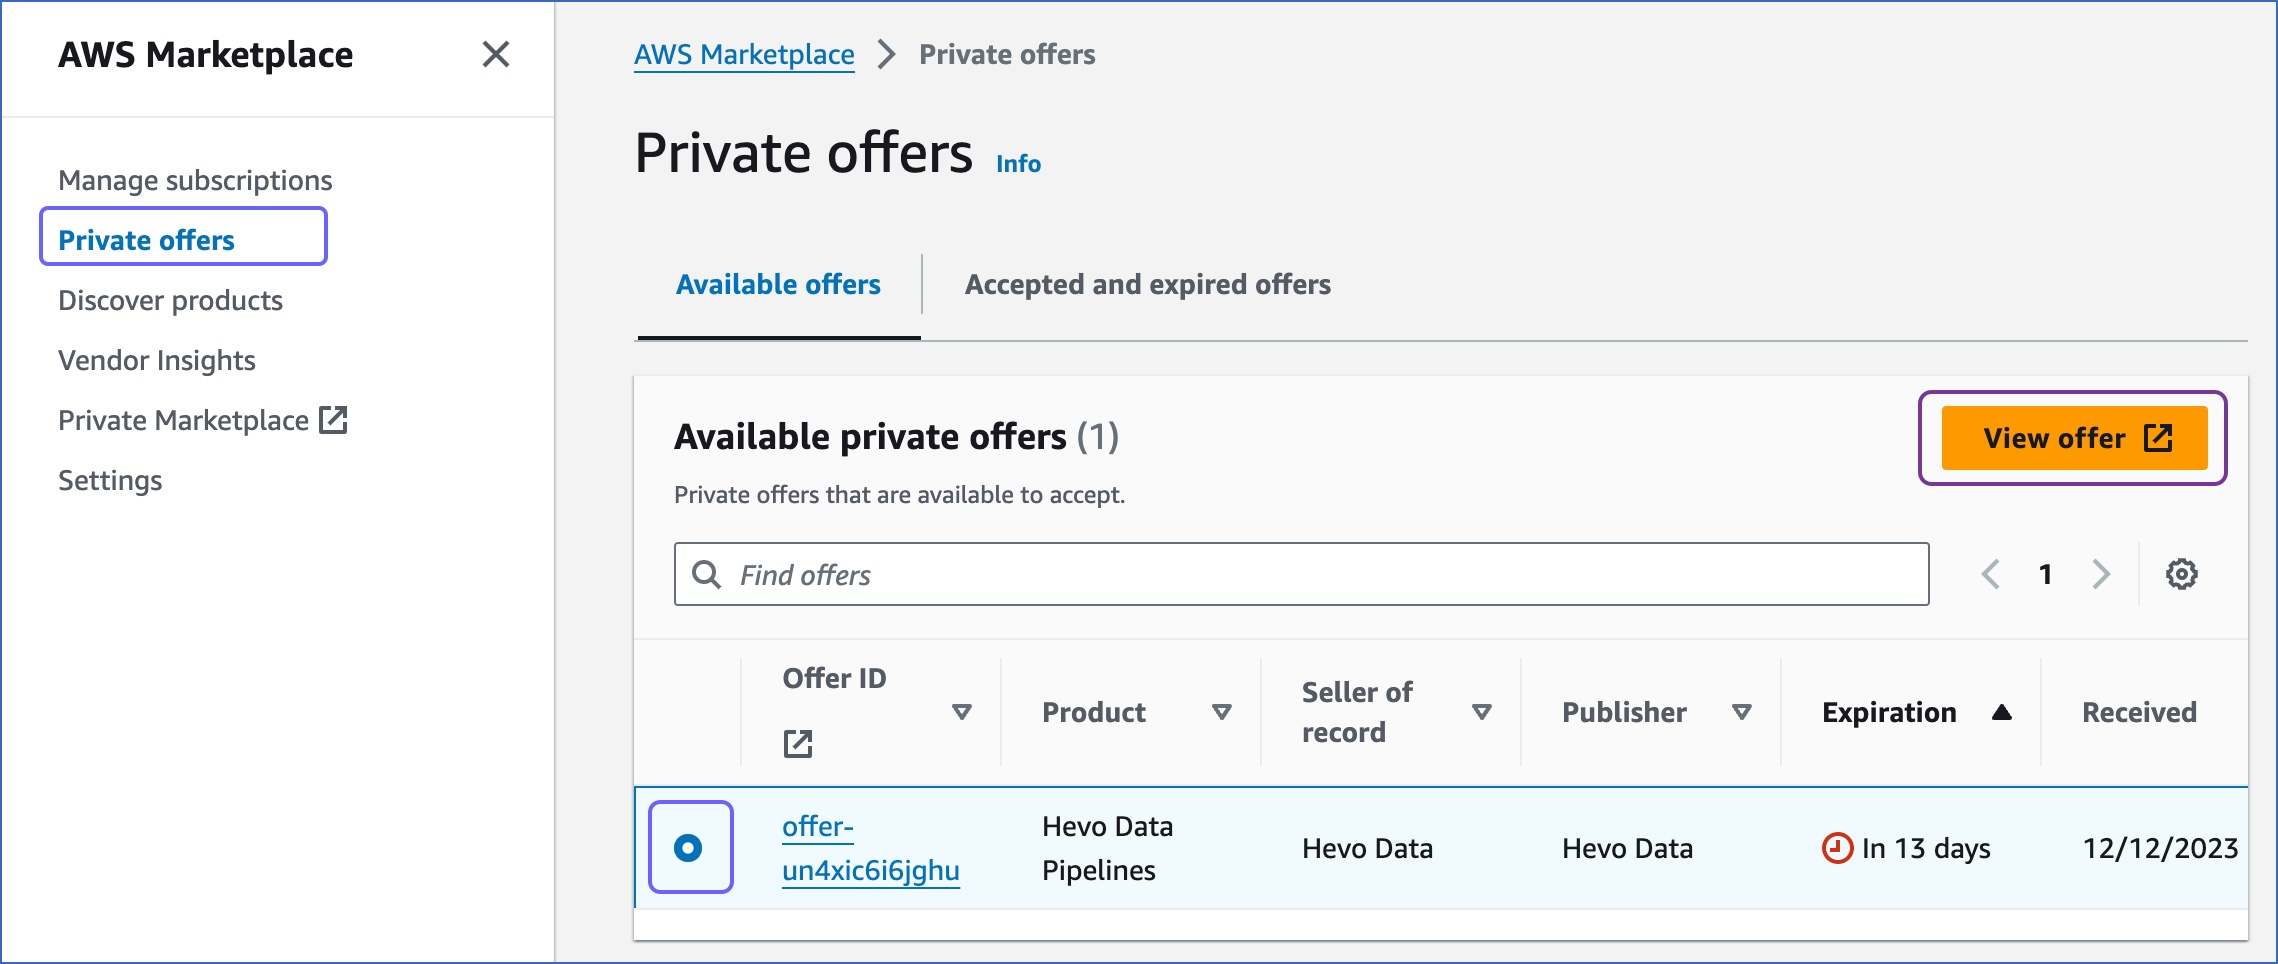
Private offers page. In the console, go to Private offers → Available offers tab → click the Offer ID.
Product page. Open the product listing; a banner at the top shows the private offer, Offer ID and expiration date. Click the Offer ID. If you have several offers, each appears under Offer name; a renewal you already hold is marked In use.
Step 2 — Review the offer details
Check that every negotiated term on the page matches what you agreed with the seller before you click anything.
Confirm the Offer ID / Offer name is the one the seller referenced; you may have more than one offer for the same product.
Pricing details: verify the dimensions (tiers, units, seats) and quantities.
Payment information: with a flexible payment schedule, each installment date and amount is listed. Without one, the full contract amount is billed on acceptance.
Terms and conditions: confirm the EULA is the one you negotiated (standard SCMP or custom).
Contract duration and purchase order: check the term length, and enter a PO number if your finance team needs it on the invoice.
Step 3 — Accept the offer
The button at the bottom of the offer page reads Accept on most offers (some show Subscribe, Create contract or Accept offer); click it once and wait.
If the offer lists unit options under Available units, select one first; the Accept button stays greyed out until you do.
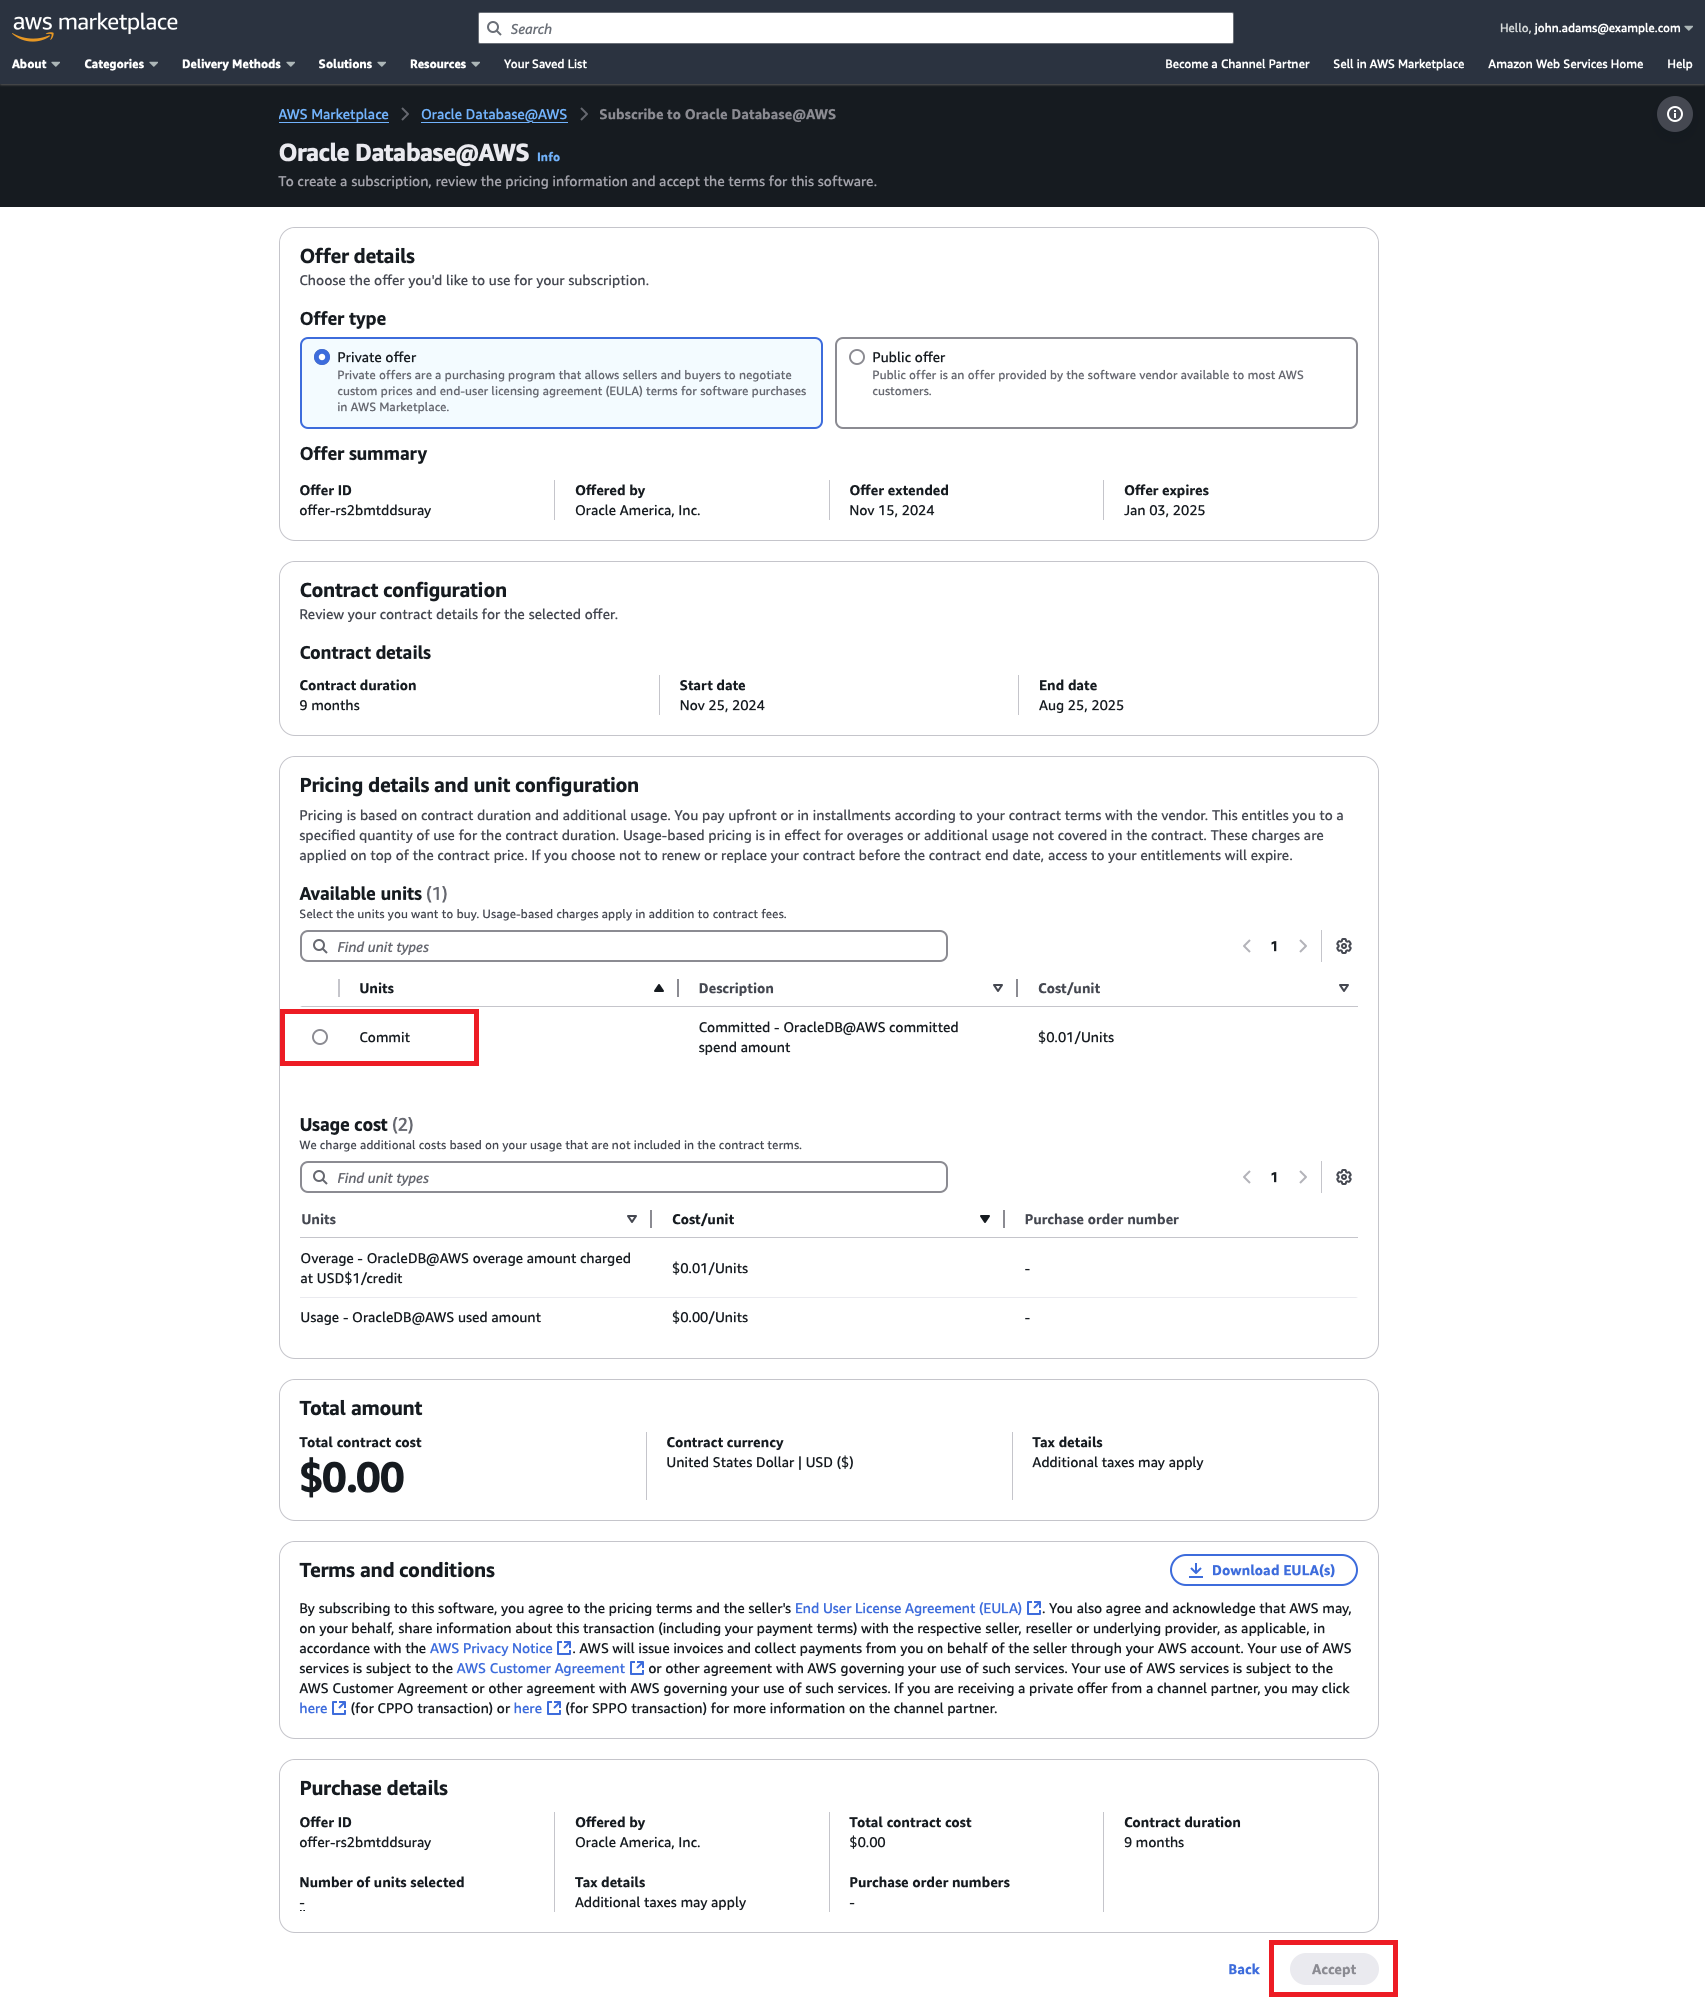
The offer page: confirm Private offer is selected, review contract, pricing and EULA, select a unit, then click Accept at the bottom.
Click Accept (or Subscribe) at the bottom of the offer page.
Do not refresh or close the browser while AWS processes the contract.
A confirmation page appears with the agreement summary (product, vendor, pricing model, total cost), estimated tax, payment schedule if any, and your PO number.
Check the confirmation against your negotiated terms.
Step 4 — Set up your account (SaaS registration)
After subscribing, click Set up your account so the seller can link your AWS subscription to an account in their product. Skipping this leaves you subscribed and billed in AWS, but with no product access.
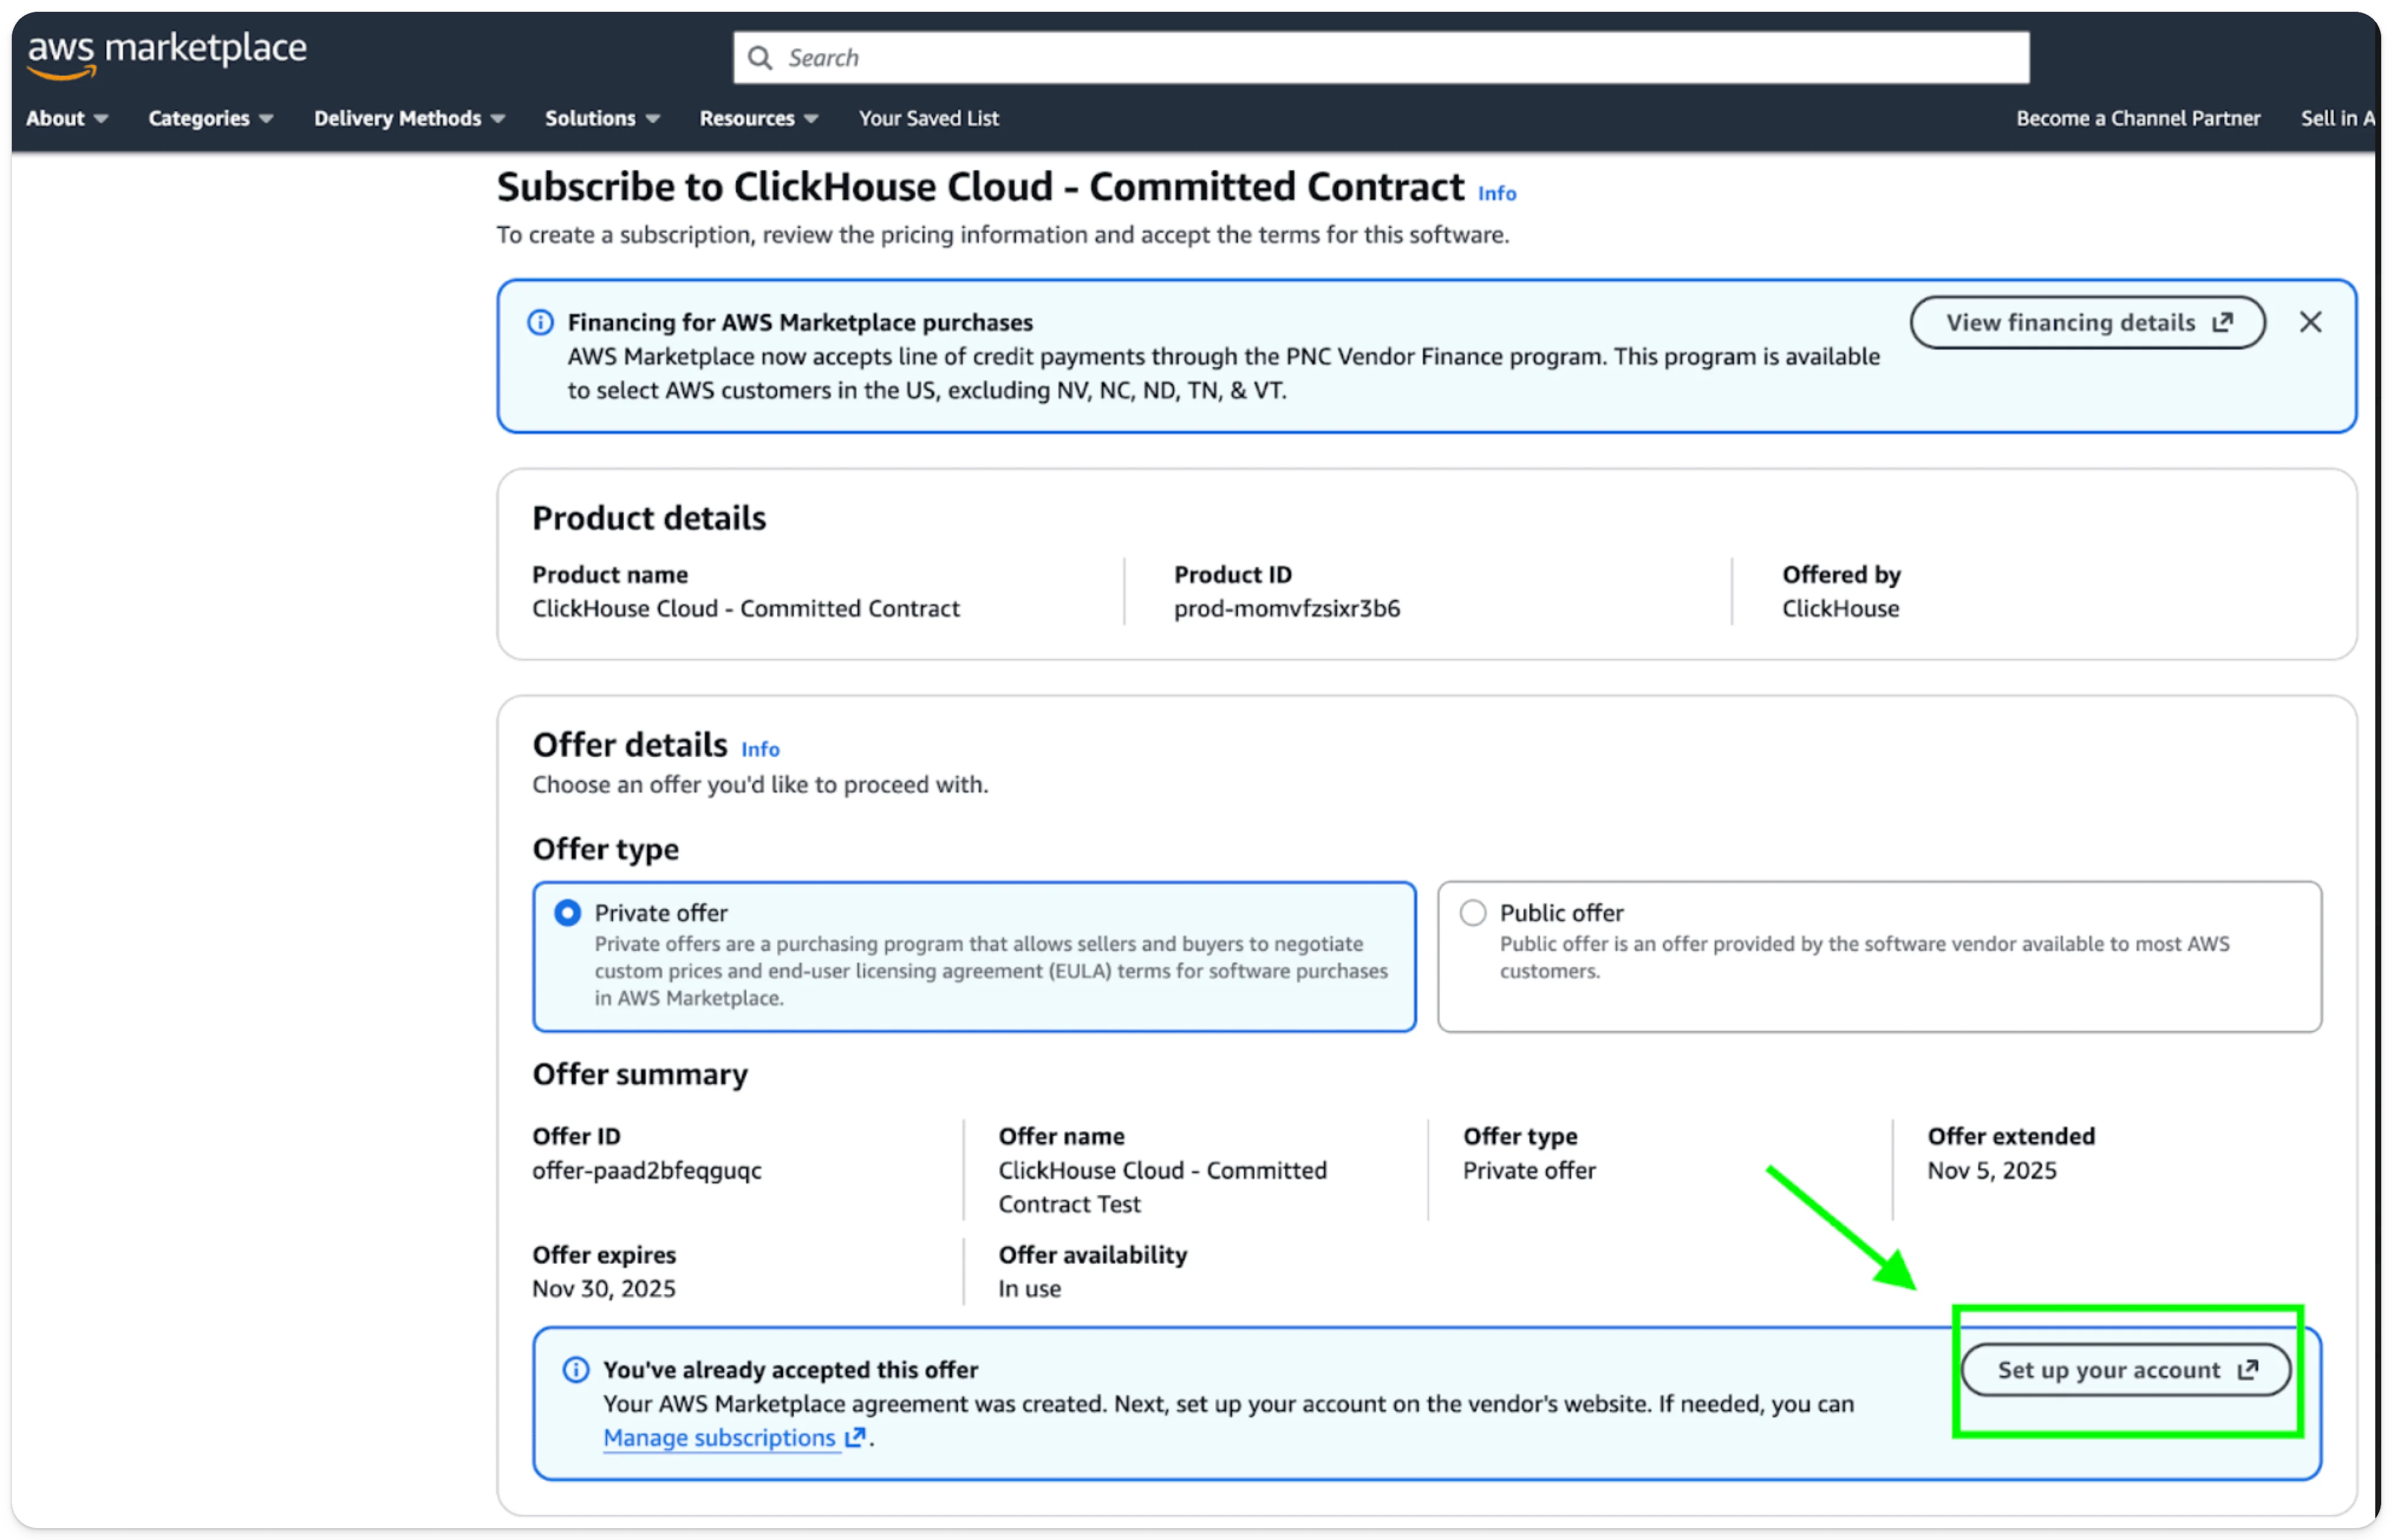
After acceptance the banner reads "You've already accepted this offer"; click Set up your account.
On the confirmation page (or the success banner), click Set up your account.
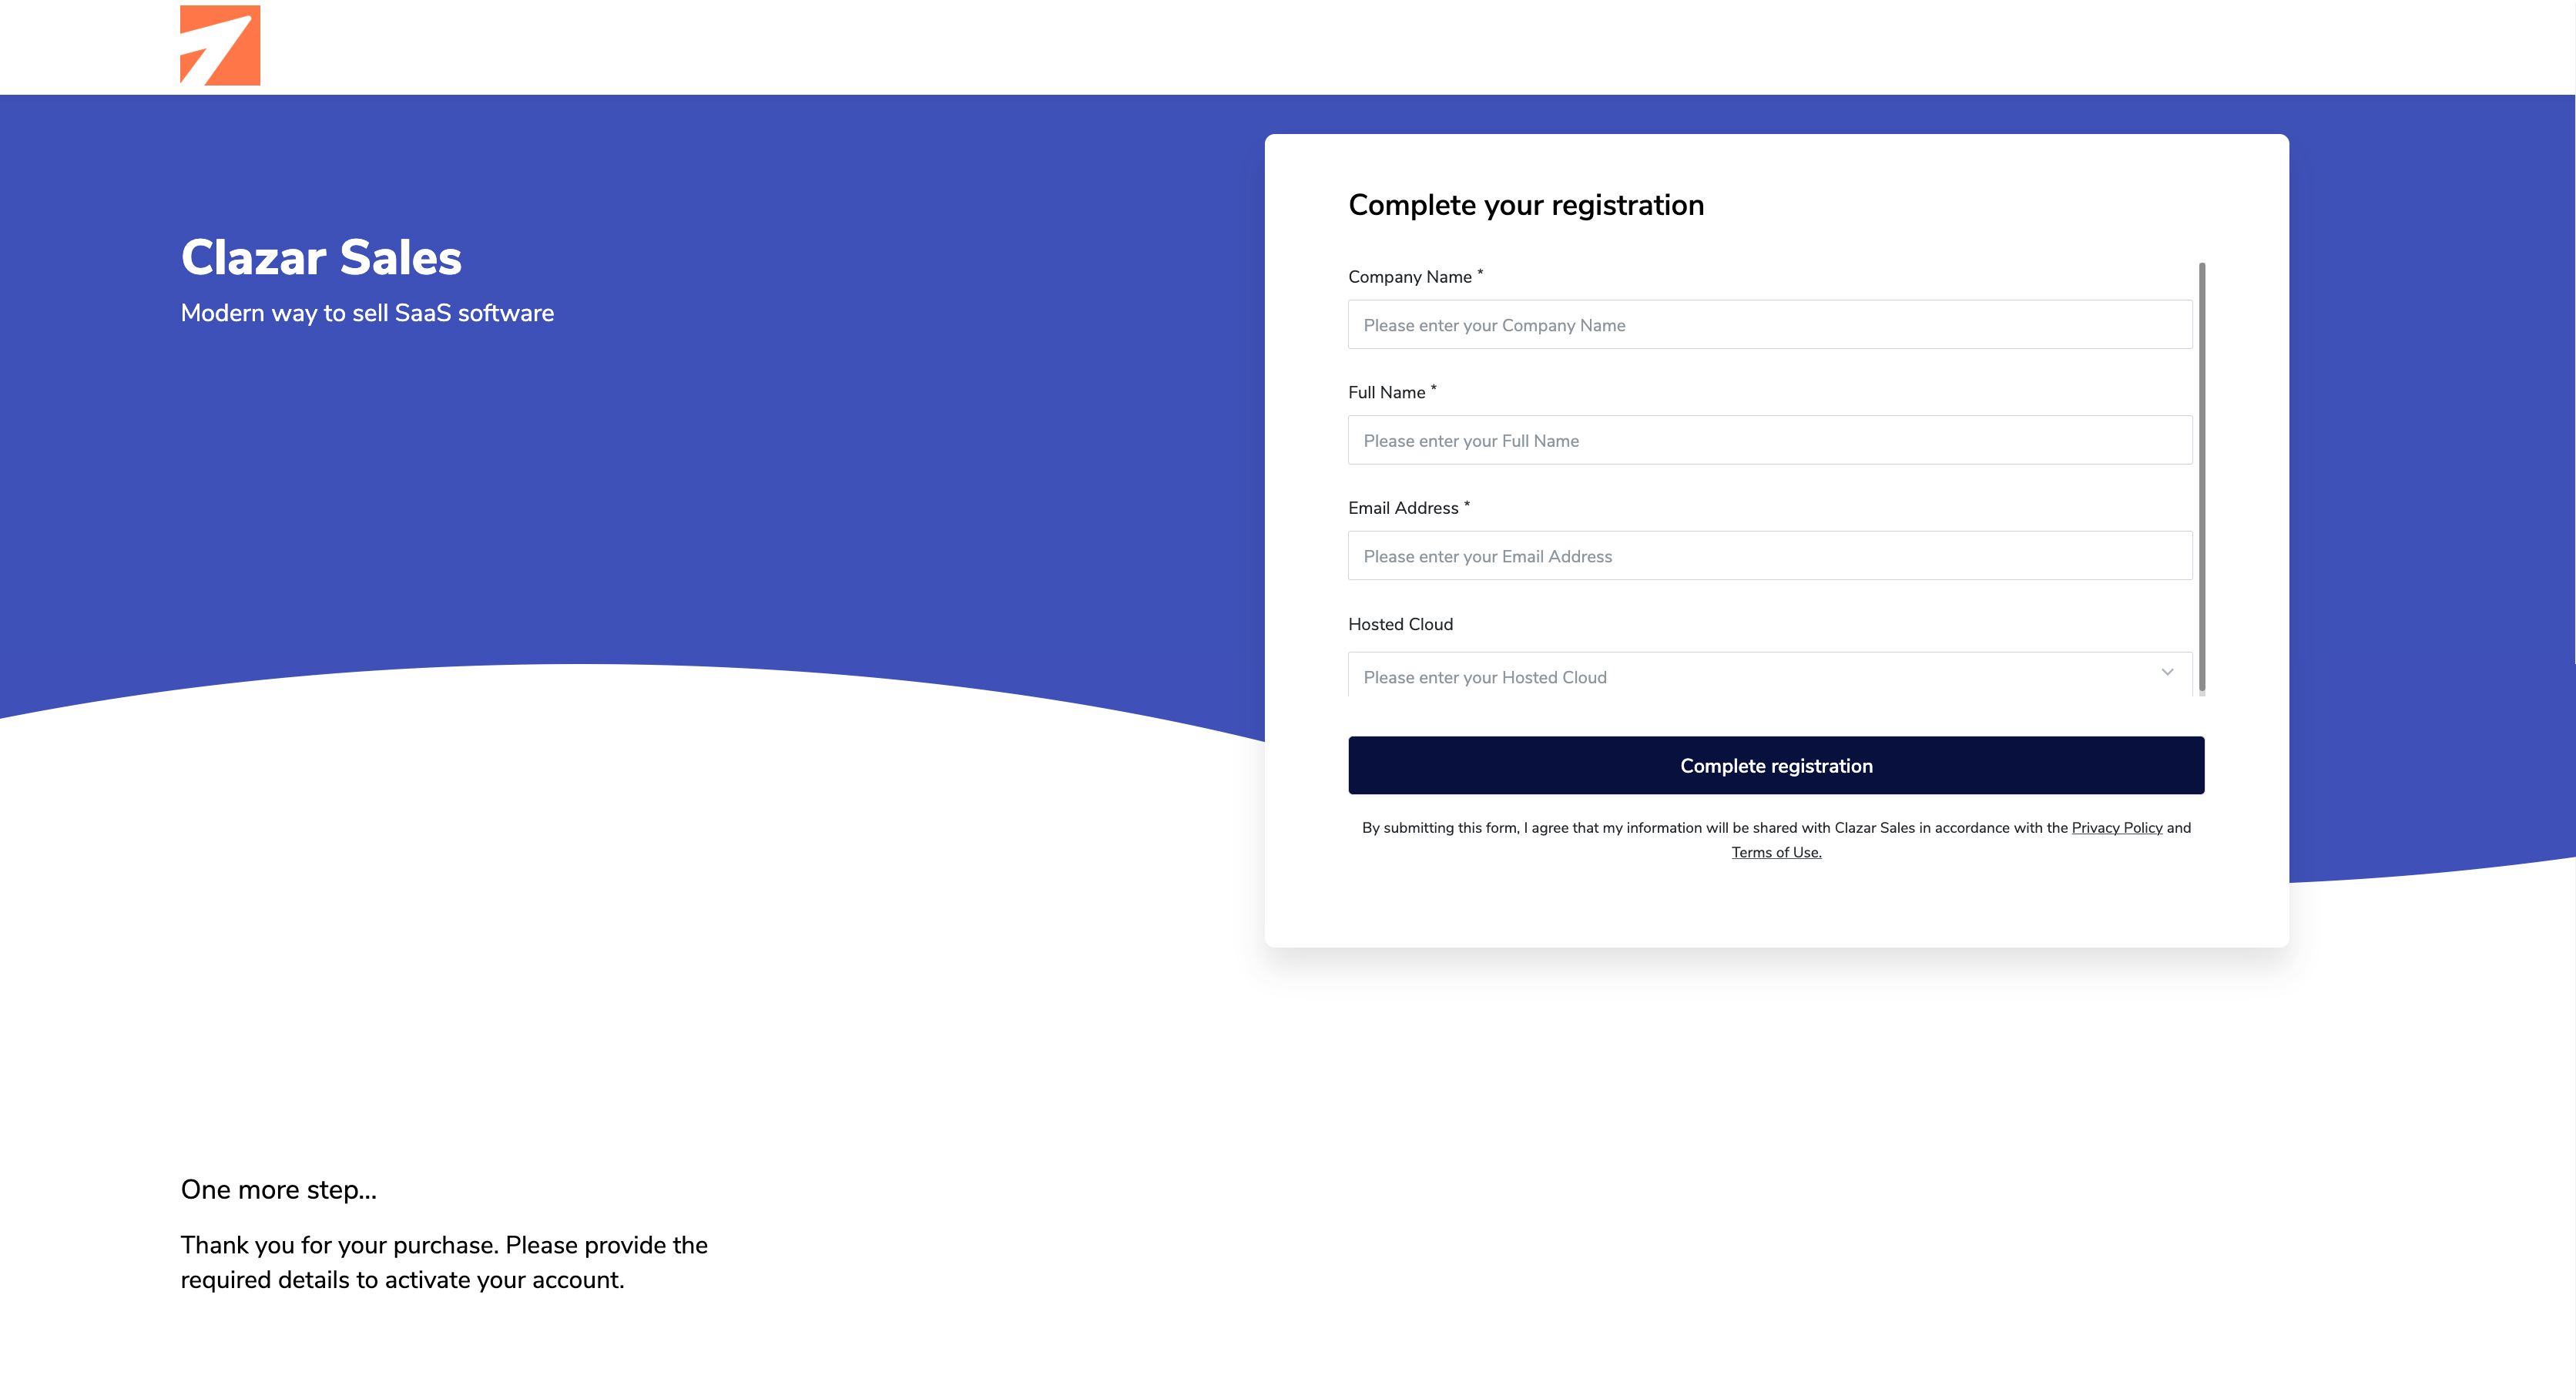
AWS opens the seller's registration page (their fulfillment URL) in your browser. Behind the scenes, AWS sends a one-time registration token that identifies your AWS account and subscription.
Fill in the seller's form: Company Name, Full Name and Email Address are typical; some sellers ask for more.
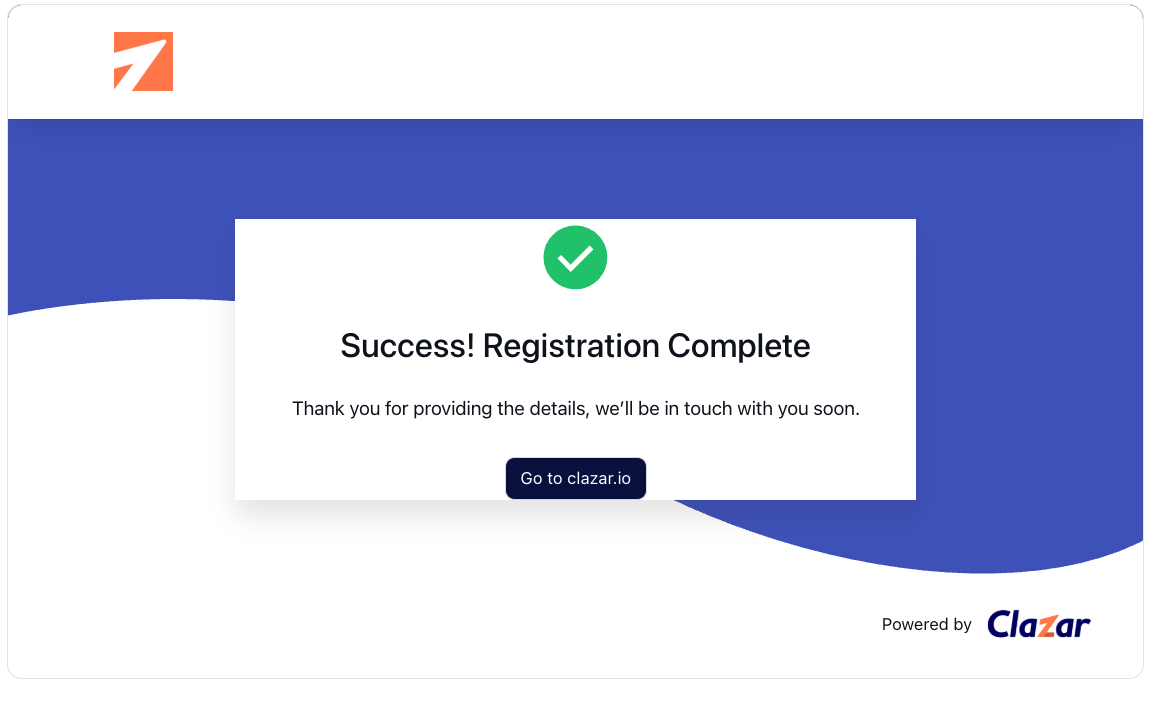
Submit the form (the button name varies by seller). The seller shows a confirmation page.
Watch for the seller's welcome or activation email; some sellers provision accounts manually and contact you within a business day.
Step 5 — Confirm the subscription
You're done when the product shows as active in AWS and you can sign in to the seller's product.
AWS confirmation email received for the new subscription.
Product listed under Manage subscriptions in the AWS Marketplace console, with the agreement showing the private offer terms.
Seller's registration completed and welcome/activation email received.
Charges appear on your next AWS invoice (or per the installment schedule), alongside your other AWS Marketplace purchases.
Let your seller contact know you've accepted, and share the AWS account ID used.